For many bloggers, sentences starting with “add these lines of code into the .htaccess file” are more frightening than the most-awarded horror movies. The admin-friendly themes and plugins in addition to page builders considerably simplified the life of WordPress users. Nowadays, you can design a functional and good-looking website without writing a single line of code.
However, having at least a limited knowledge of how the WordPress core works is recommended for the average WordPress user. This post is a good start in this regard – it’s an introduction to the WordPress directory structure.
How to Access the WordPress Core
All WordPress-powered websites have a similar directory structure (sometimes, the name of some files are different, but 95 percent of them are identical), and you can access them by using two methods.
Using an FTP (File Transfer Protocol) Client
WP Beginner published a useful article teaching readers to use an FTP client – it has a video, and you can watch how a developer uses it. In other words, you have the necessary guidance to discover the files of your WordPress installation.
Using File Manager from cPanel Dashboard
Most likely, the username and the password of your cPanel dashboard are stored within the first emails received from your hosting (take care of these emails). Once you successfully log in to the cPanel dashboard you should access File Manager and see your files.
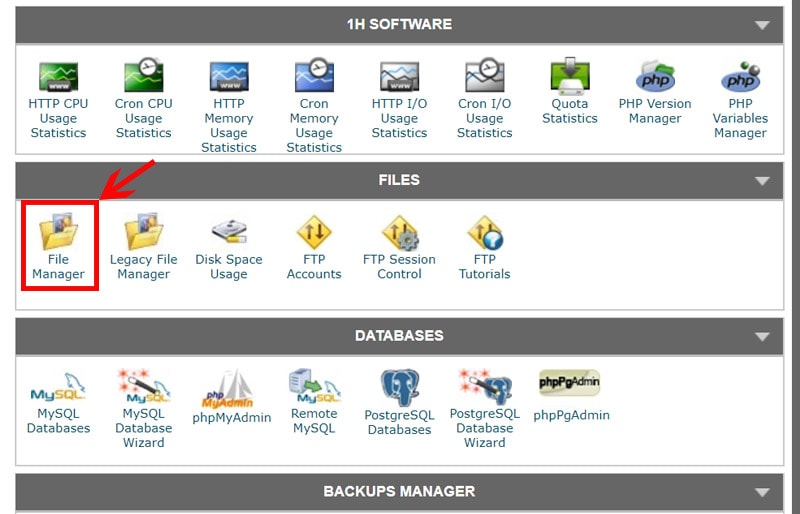
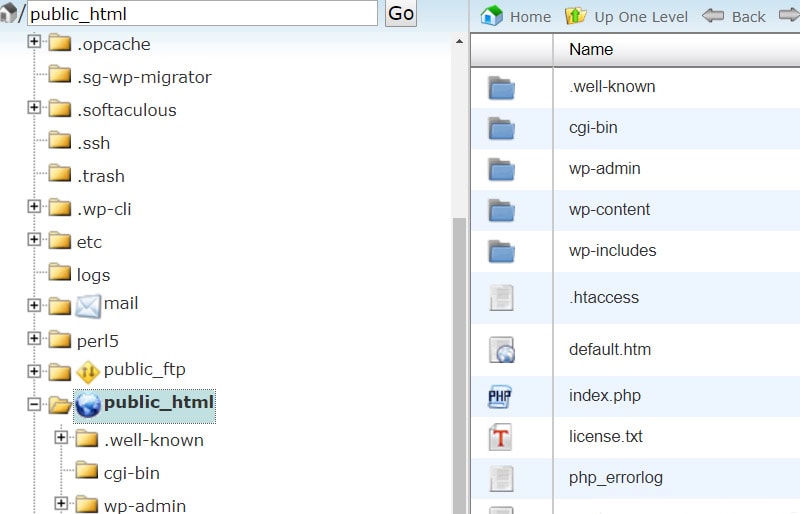
Amongst other folders, there is one named public_html; it is the one that deserves your attention. Double-click on it and you see the files of your website. There are at least three folders: wp-admin, wp-content, and wp-includes.
1. wp-admin

This folder contains various files aimed towards ensuring the functioning of the WordPress dashboard. The names of the files included in wp-admin are indicative of their contents: admin-functions.php, admin-header.php, admin.php, post.php, and setup-config.php. Less-experienced users should avoid modifying these files.
2. wp-content
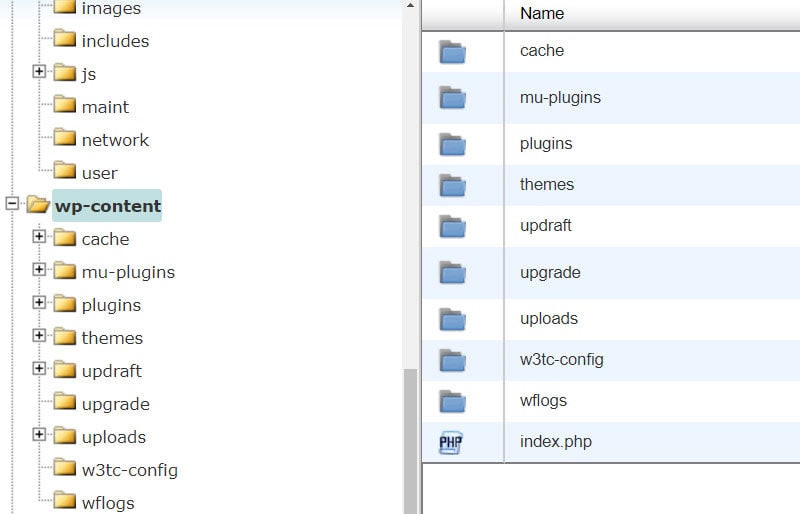
This folder stores all the user’s uploaded files, and it’s divided into three sub-folders: themes, plugins, and uploads. Don’t worry if you have more than three sub-folders; it’s not a carved-in-stone rule.
- themes
The name of the sub-folder is quite suggestive; here are housed the files of the themes installed. You should have at least one theme installed in this folder. It’s not recommended to modify or customize the theme from this folder because when an update is rolled out, the modifications are lost. - plugins
Like the previous sub-folder, the name of this one can be understood by any level of WordPress user. Here the installed plugins are stored, with each one having its own sub-folder. - uploads
Across time, a WordPress user uploads many images and other media files. If you want to see the files you’ve uploaded, check this sub-folder; all of them are archived here.
3. wp-includes
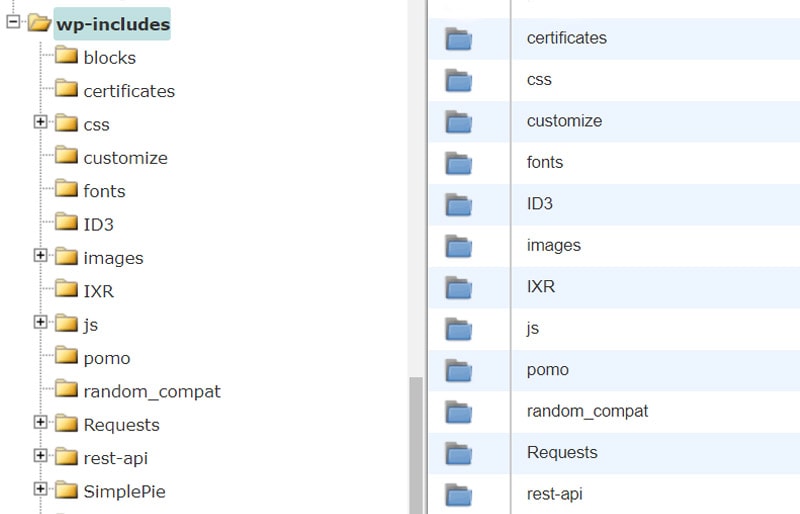
This is the folder that contains the files required for WordPress’s core operations. Here is where most of the files needed to run your website are stored. Avoid making any modifications to these files.
Aside from these folders and sub-folders, there are a bunch of .php files that play a big role in running a WordPress website. Let’s get to them next!
4. .htaccess
This file is responsible for your website security and performance. There’s a high chance you will hear about it when fixing the permalinks. Keep in mind that it is a very important file, and you can do a lot of things by inserting a few lines of code. Don’t worry about that; it’s just a copy-and-paste matter!
Finding your .htaccess file (htaccess stands for hypertext access) may cause some trouble. Usually, there are two distinct situations when you can’t find the file.
Important: The .htaccess file exists only on Apache servers. Contact your hosting support team and ask what kind of servers store your site files on.
Most shared-hosting providers run their servers on Apache, so you can apply the following tips and code snippets. Other servers run on Nginx web servers, which don’t support the .htaccess file. A working solution is to use an htacess-to-Nginx converter. Paste the code snippets into the form and press the convert button to generate the code for your Nginx servers. Copy the newly generated code and upload it to your site.
You are not allowed to see the hidden files
Due to its major importance, this file is hidden by default. Therefore, you should go to the Settings of your FTP client or to the cPanel dashboard and make sure that you are allowed to see the hidden files.
You don’t have a .htaccess file
It’s quite possible that you do not have an .htaccess file if you didn’t change the default permalinks. That doesn’t mean that your website is broken or different from others. In fact, you are able to resolve this situation in no time! It’s simple. Just open a text editor (for instance, Notepad) and paste the lines of code below:
# BEGIN WordPress
<IfModule mod_rewrite.c>
RewriteEngine On
RewriteBase /
RewriteRule ^index\.php$ - [L]
RewriteCond %{REQUEST_FILENAME} !-f
RewriteCond %{REQUEST_FILENAME} !-d
RewriteRule . /index.php [L]
</IfModule>
# END WordPress
Save this file on your hard drive, name it “.htaccess,” and upload it to your website. From now on, you will have an .htaccess file for your website. Once you have created an .htaccess file, you are able to make some modifications that will significantly improve the security and performance of your website. My recommendation is to back up your .htaccess file before making any changes; in this way, you can restore the previous file unless something goes wrong. Don’t skip this step (in fact, don’t skip backing up your website). These little tricks may prove to be extremely useful in some situations.
Protect .htaccess from unauthorized access
I mentioned in the previous paragraph that a .htaccess file is capital for a website, so it makes sense to present how to protect it from unauthorized access. Luckily, this step strengthens the security of a website and consists of adding just five lines of code! Copy the code below, paste it into your .htaccess file, and upload via FTP/cPanel. Refresh your website, and from now on, you will be more secure!
<files ~ "^.*\.([Hh][Tt][Aa])">
order allow,deny
deny from all
satisfy all
</files>
Ban an IP address
Many security plugins offer information about the IP addresses that try to login to your dashboard. Most likely, the users behind these IP addresses were trying to hack your website. If you insert the lines of code below into the .htaccess file, you will ban IP addresses that are suspicious.
<Limit GET POST>
order allow,deny
deny from xxx.xxx.xx.x
allow from all
</Limit>
(xxx.xxx.xx.x – is the IP address you want to ban)
Restrict the access to wp-includes folder
You already know the role of the wp-includes folder, and you are aware that there are no files that should be modified, updated, or deleted. In other words, it’s recommended to secure the folder against unauthorized users. By adding the code below into the .htaccess file, you will restrict the access to the wp-includes folder.
<IfModule mod_rewrite.c>
RewriteEngine On
RewriteBase /
RewriteRule ^wp-admin/includes/ - [F,L]
RewriteRule !^wp-includes/ - [S=3]
RewriteRule ^wp-includes/[^/]+\.php$ - [F,L]
RewriteRule ^wp-includes/js/tinymce/langs/.+\.php - [F,L]
RewriteRule ^wp-includes/theme-compat/ - [F,L]
</IfModule>
Disable directory browsing
By default, directory browsing is enabled; this isn’t a security flaw, but it can indirectly help a hacker get hints about how to hack your website. Disabling directory browsing is simple. Just paste into the .htaccess file this line of code:
Options All –Indexes
Protect wp-config.php
wp-config.php is another important file for a WordPress website and needs to be protected. It’s advisable to prevent access to it. By adding the following lines of code, you will accomplish this task.
<files wp-config.php>
order allow,deny
deny from all
</files>
5. wp-config.php
So, what is wp-config.php and what are its roles?
wp-config.php is responsible for making the connection between WordPress database and WordPress files. Definitely, it has a major role in running a website.
By installing WordPress via cPanel, it creates a wp-config.php file by default. If you chose to install WordPress manually, then you must edit wp-config.php file.
In the last situation, you should search in the root directory for a wp-config-sample.php file and rename it wp-config.php. You are required to add into the file some data as follows:
- database name
- username used to access the database
- password used to access the database
- hostname of the database server
WP Sites helps us a lot by offering a wp-config.php sample file and this video is aimed to make a clearer idea about how to set up a wp-config.php file.
Customizing wp-config.php file is a risky job; any mistake is synonymous to damaging your website. To better understand the role of this file, you can compare it with the human heart. Even though it’s about simple heart surgery procedures, the medics take all the precautionary measures to avoid unexpected problems. The same strategy should be adopted by you – be extremely careful with this file; it’s the heart of your website!
If you are a beginner, I don’t recommend making changes on wp-config.php unless you are sure about what you do. Here are some basic tricks available by modifying some lines of code.
Tailor the auto-save frequency
By default, WordPress saves your work every 60 seconds. wp-config.php file helps you to modify the frequency. Use any time interval you want – replace the XXX with the number of seconds between two auto-updates.
define( ‘AUTOSAVE_INTERVAL’, XXX );
Enable WordPress Multisite
WordPress Multisite is a great feature, and it can be enabled from wp-config.php file. This feature is set to “false” by default, so you should change it to “true.”
define(‘WP_ALLOW_MULTISITE’, true);
I think this is enough for today! I intended to present you the directory structure and some important files to make an idea about how a WordPress website is running. This is an important step in learning how to deeply customize your website or even to create themes and plugins. It’s a long journey to become a WordPress developer…in fact, it’s a never-ending journey! Wrapping up, I hope it was a useful lecture and I am waiting for your interesting comments.