We know that many users have hard times finding various settings in WPBakery Page Builder (formerly Visual Composer) when they use it for the first time. This is why we wanted to show some basic changes that you can do with this page builder plugin. Hope these small Visual Composer tutorials will help you.
Below is the map of various topics described in this post:
- How to replace or add a background image in a ROW
- How to replace or add a parallax background image in a ROW
- How to a background color in a ROW
- How to add a video parallax background
- How to add a pattern background
- How to put the content in the middle of a ROW
- How to temporarily disable a ROW
1. How to replace or add a background image in a ROW in the Visual Composer plugin.
If you want to add or change a background image in your ROW you must click on the pencil icon, go to the Design Options tab and click on the green plus icon. Always remember to save changes.

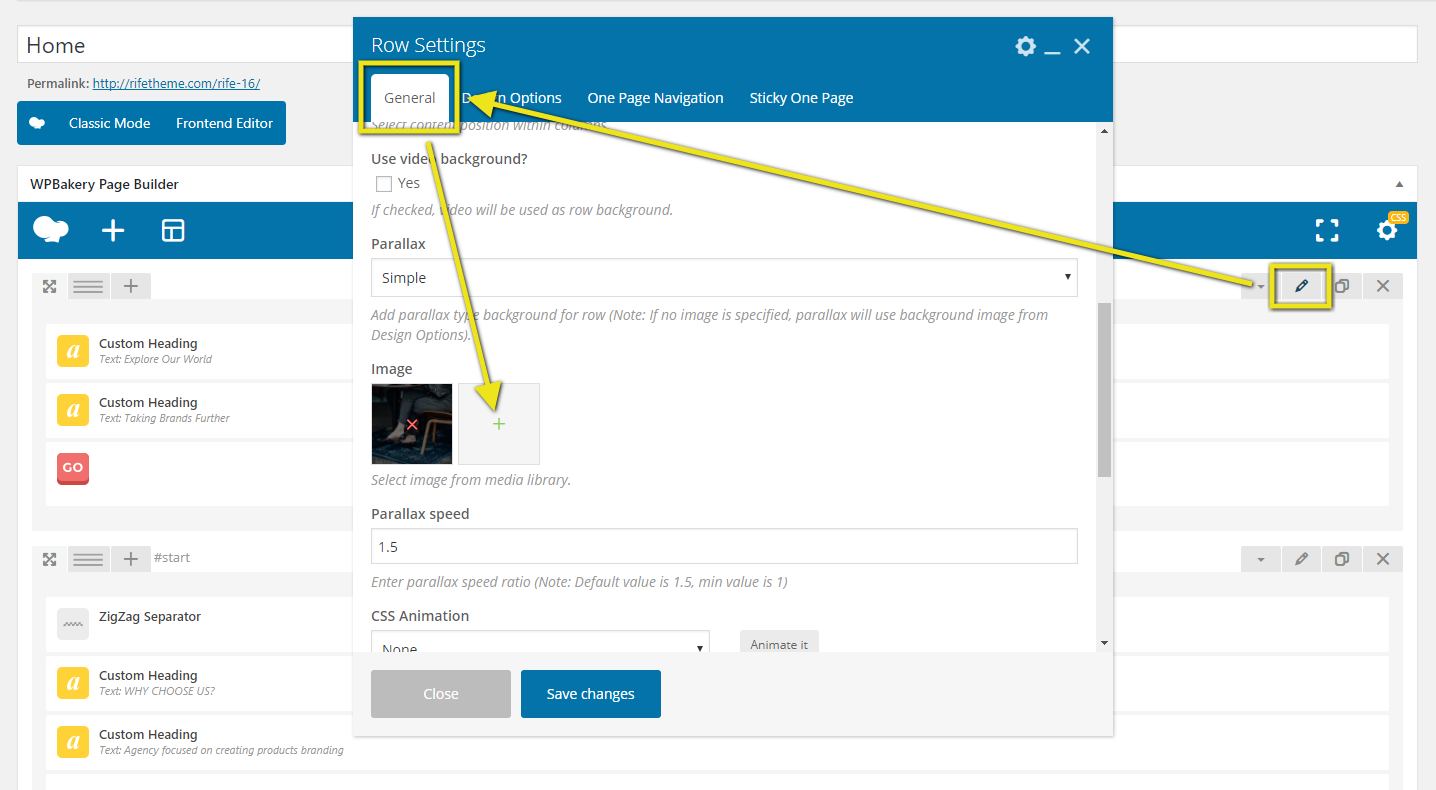
2. How to replace or add a parallax background image in a ROW in the Visual Composer plugin.
We often encounter this question, how to change the background (lady on the chair) in one of our design – Gruby. The answer is very easy, you must edit the ROW by clicking on the pencil icon and scroll down to the Image section. Click on the green plus icon, choose your image and save your ROW settings.
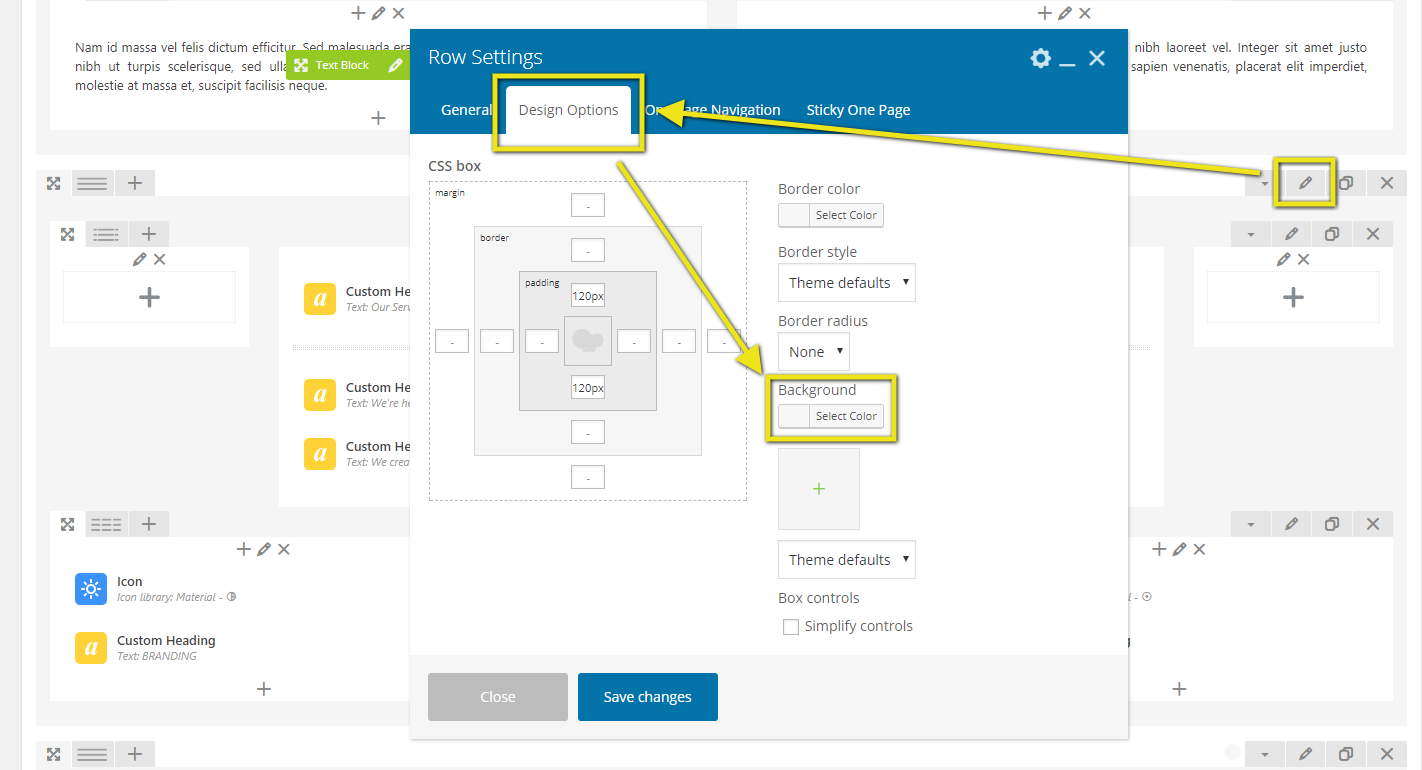
3. How to replace or add a background color in a ROW.
If you want to add or change a background color in your ROW you must click on the pencil icon, go to the Design Options tab and click on the Select Color Picker. Choose your color and save changes.
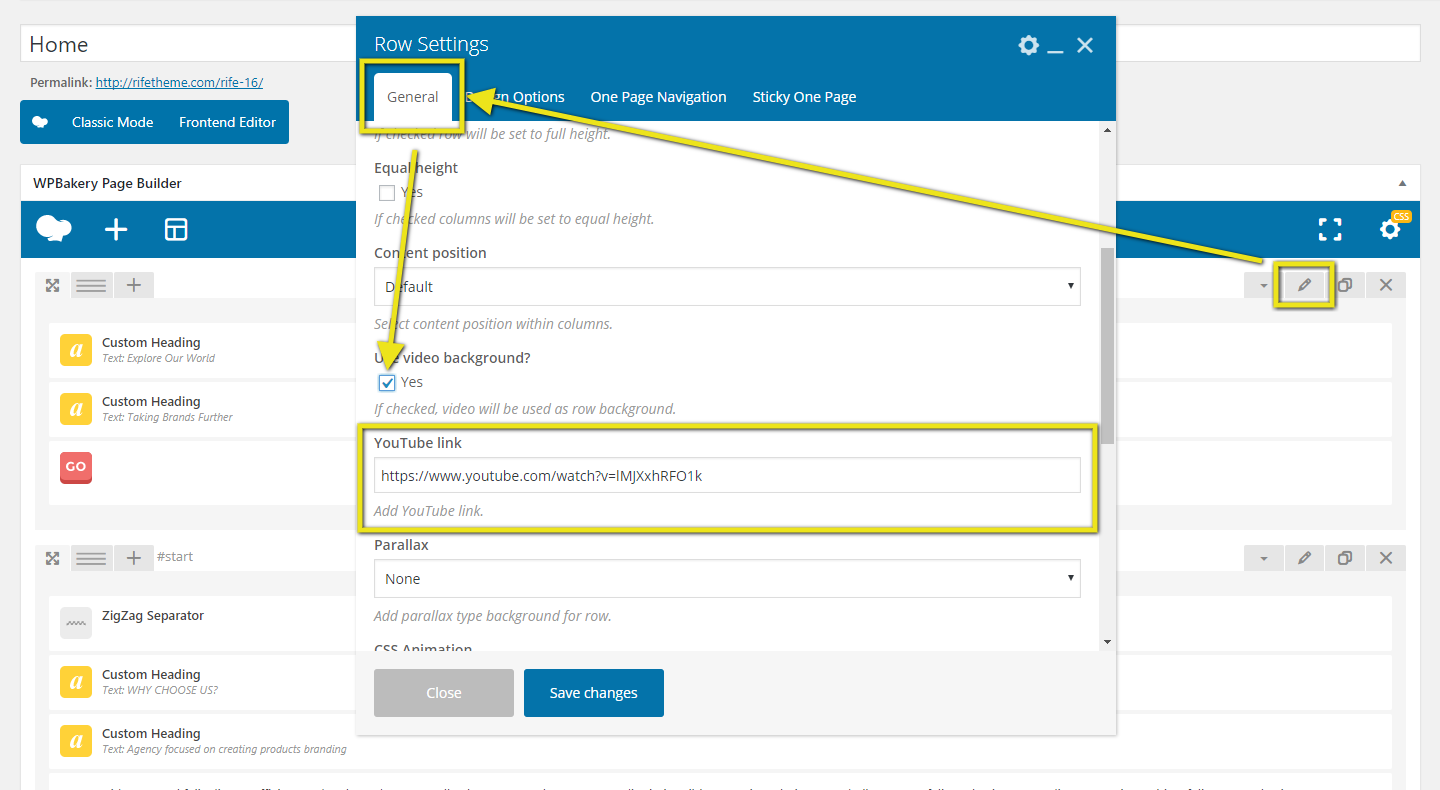
4. How to add a video parallax background in a Visual Composer ROW.
Another great way to present your content in the Visual Composer is to place a video background to your ROW. Click on the pencil icon and scroll to the Use video background? option and add your YouTube link. Always remember to save changes.
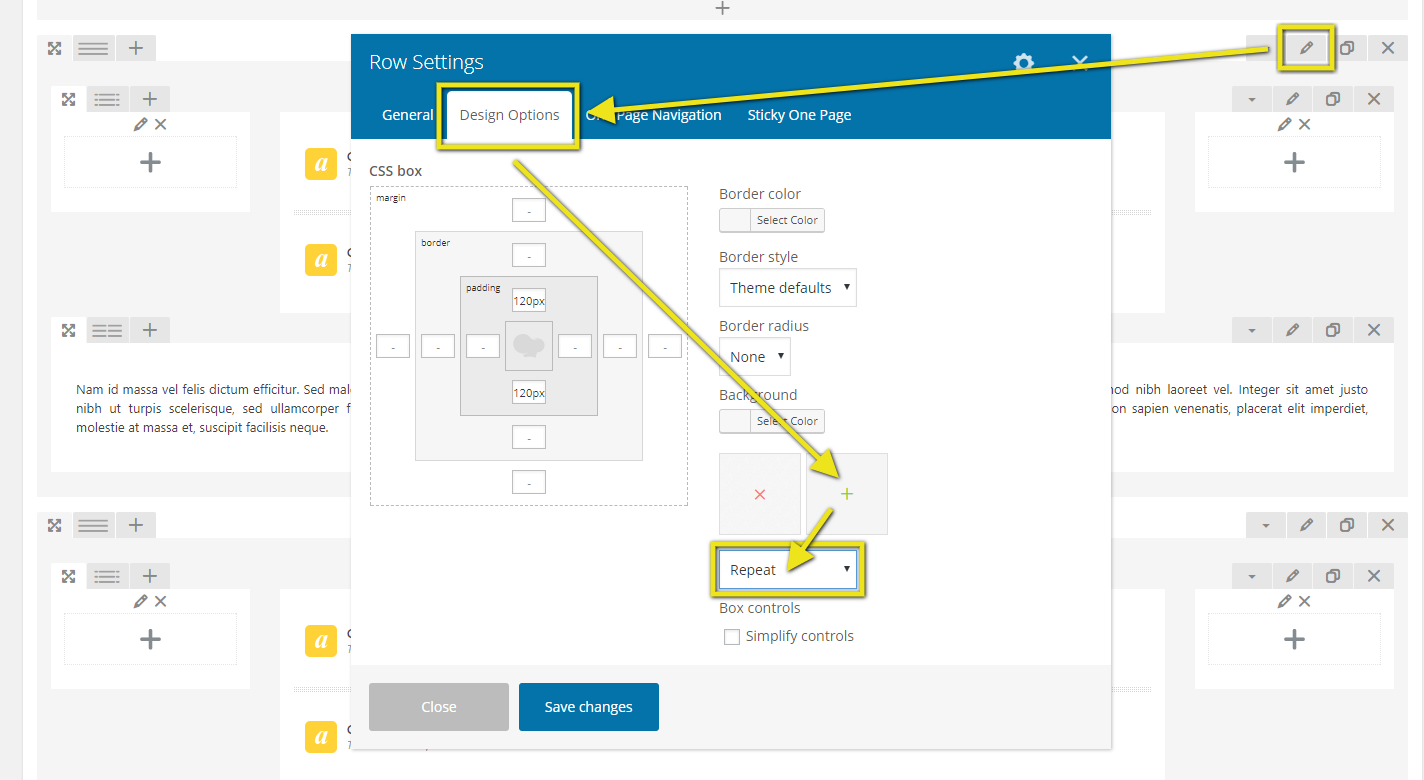
5. How to add a pattern background in a Visual Composer ROW.
If you want to add a pattern to your background but don’t know how to do it, use this method. Click on the pencil icon, switch to the Design Options tab and choose your background image. The last step is to choose the image display method, you must change it to repeat. That’s it! Have fun 🙂
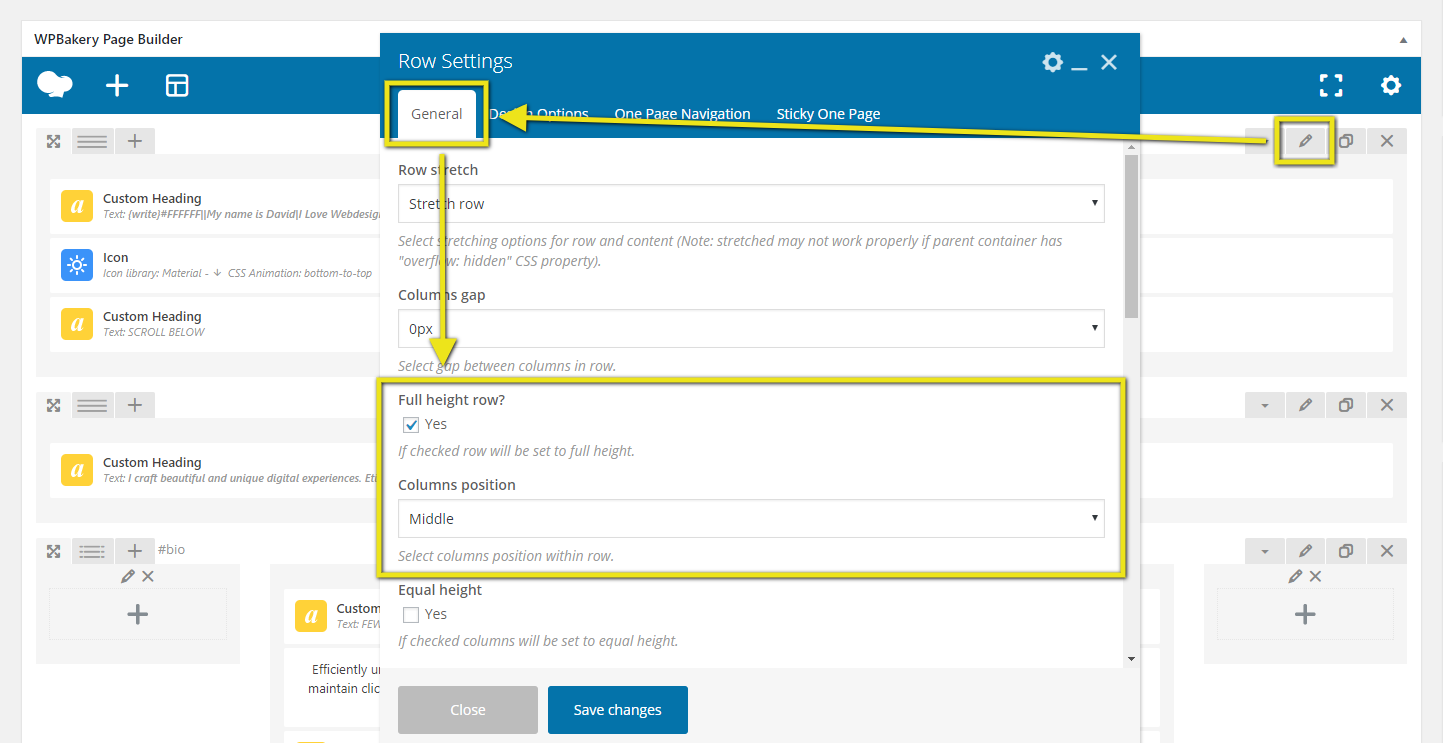
6. How to put the content in the middle of a ROW in the Visual Composer builder.
If you want to create this effect using the Visual Composer follow this method. The first thing you need to do is to stretch a ROW to full height. Next go to the Columns position and choose the Middle.
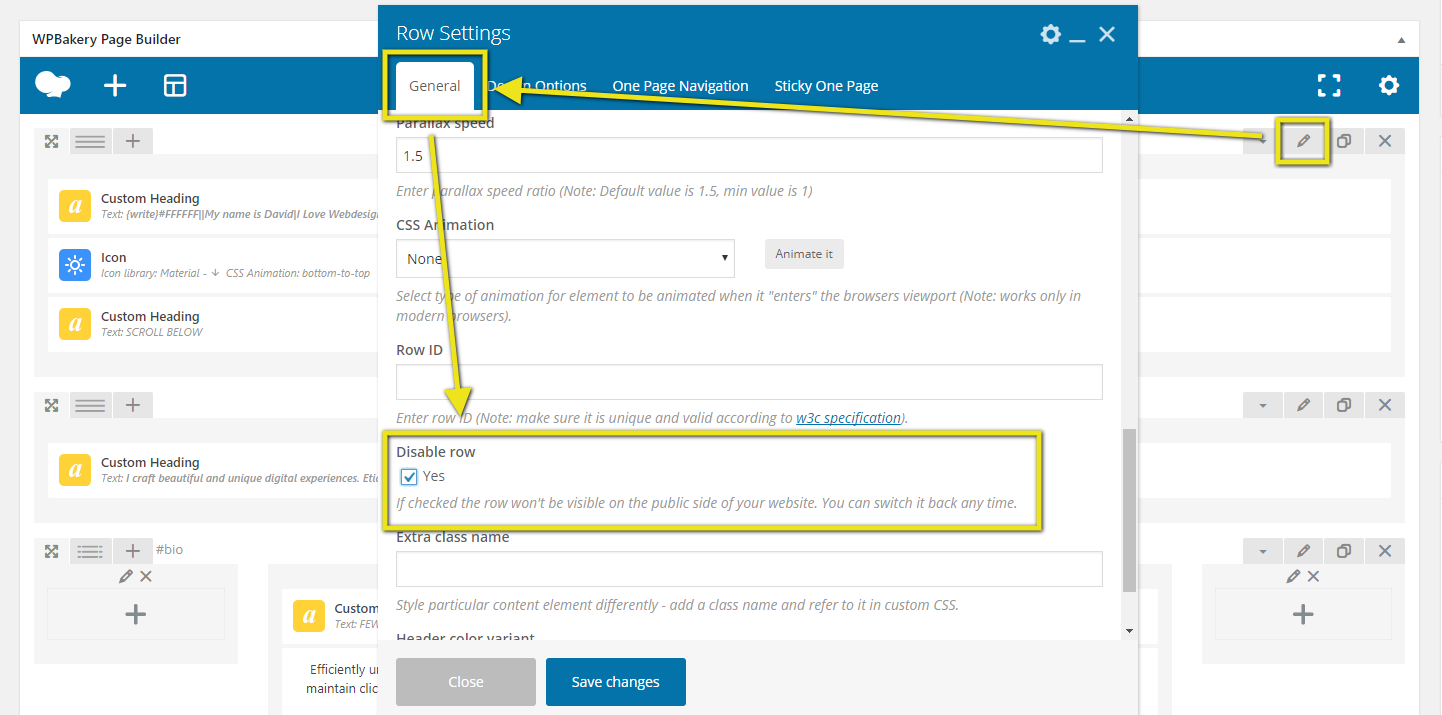
7. How to temporarily disable a ROW in the Visual Composer.
When you need to hide some information in the Visual Composer but don’t want to delete it, this option is for you. Just disable the ROW and put there your hidden information.
If you’re looking for Elementor tutorials take a look at our other post: Popular Basic Tricks for Elementor Plugin – Tutorials & Tips.